- Overview
- RpyFlask Application
- Web Components
- RpyFlask REST Server
- Enabling the WS281x LED Strip
- Enhancement: Robotic Arm
- Enhancement: LTE Smart Car
Overview
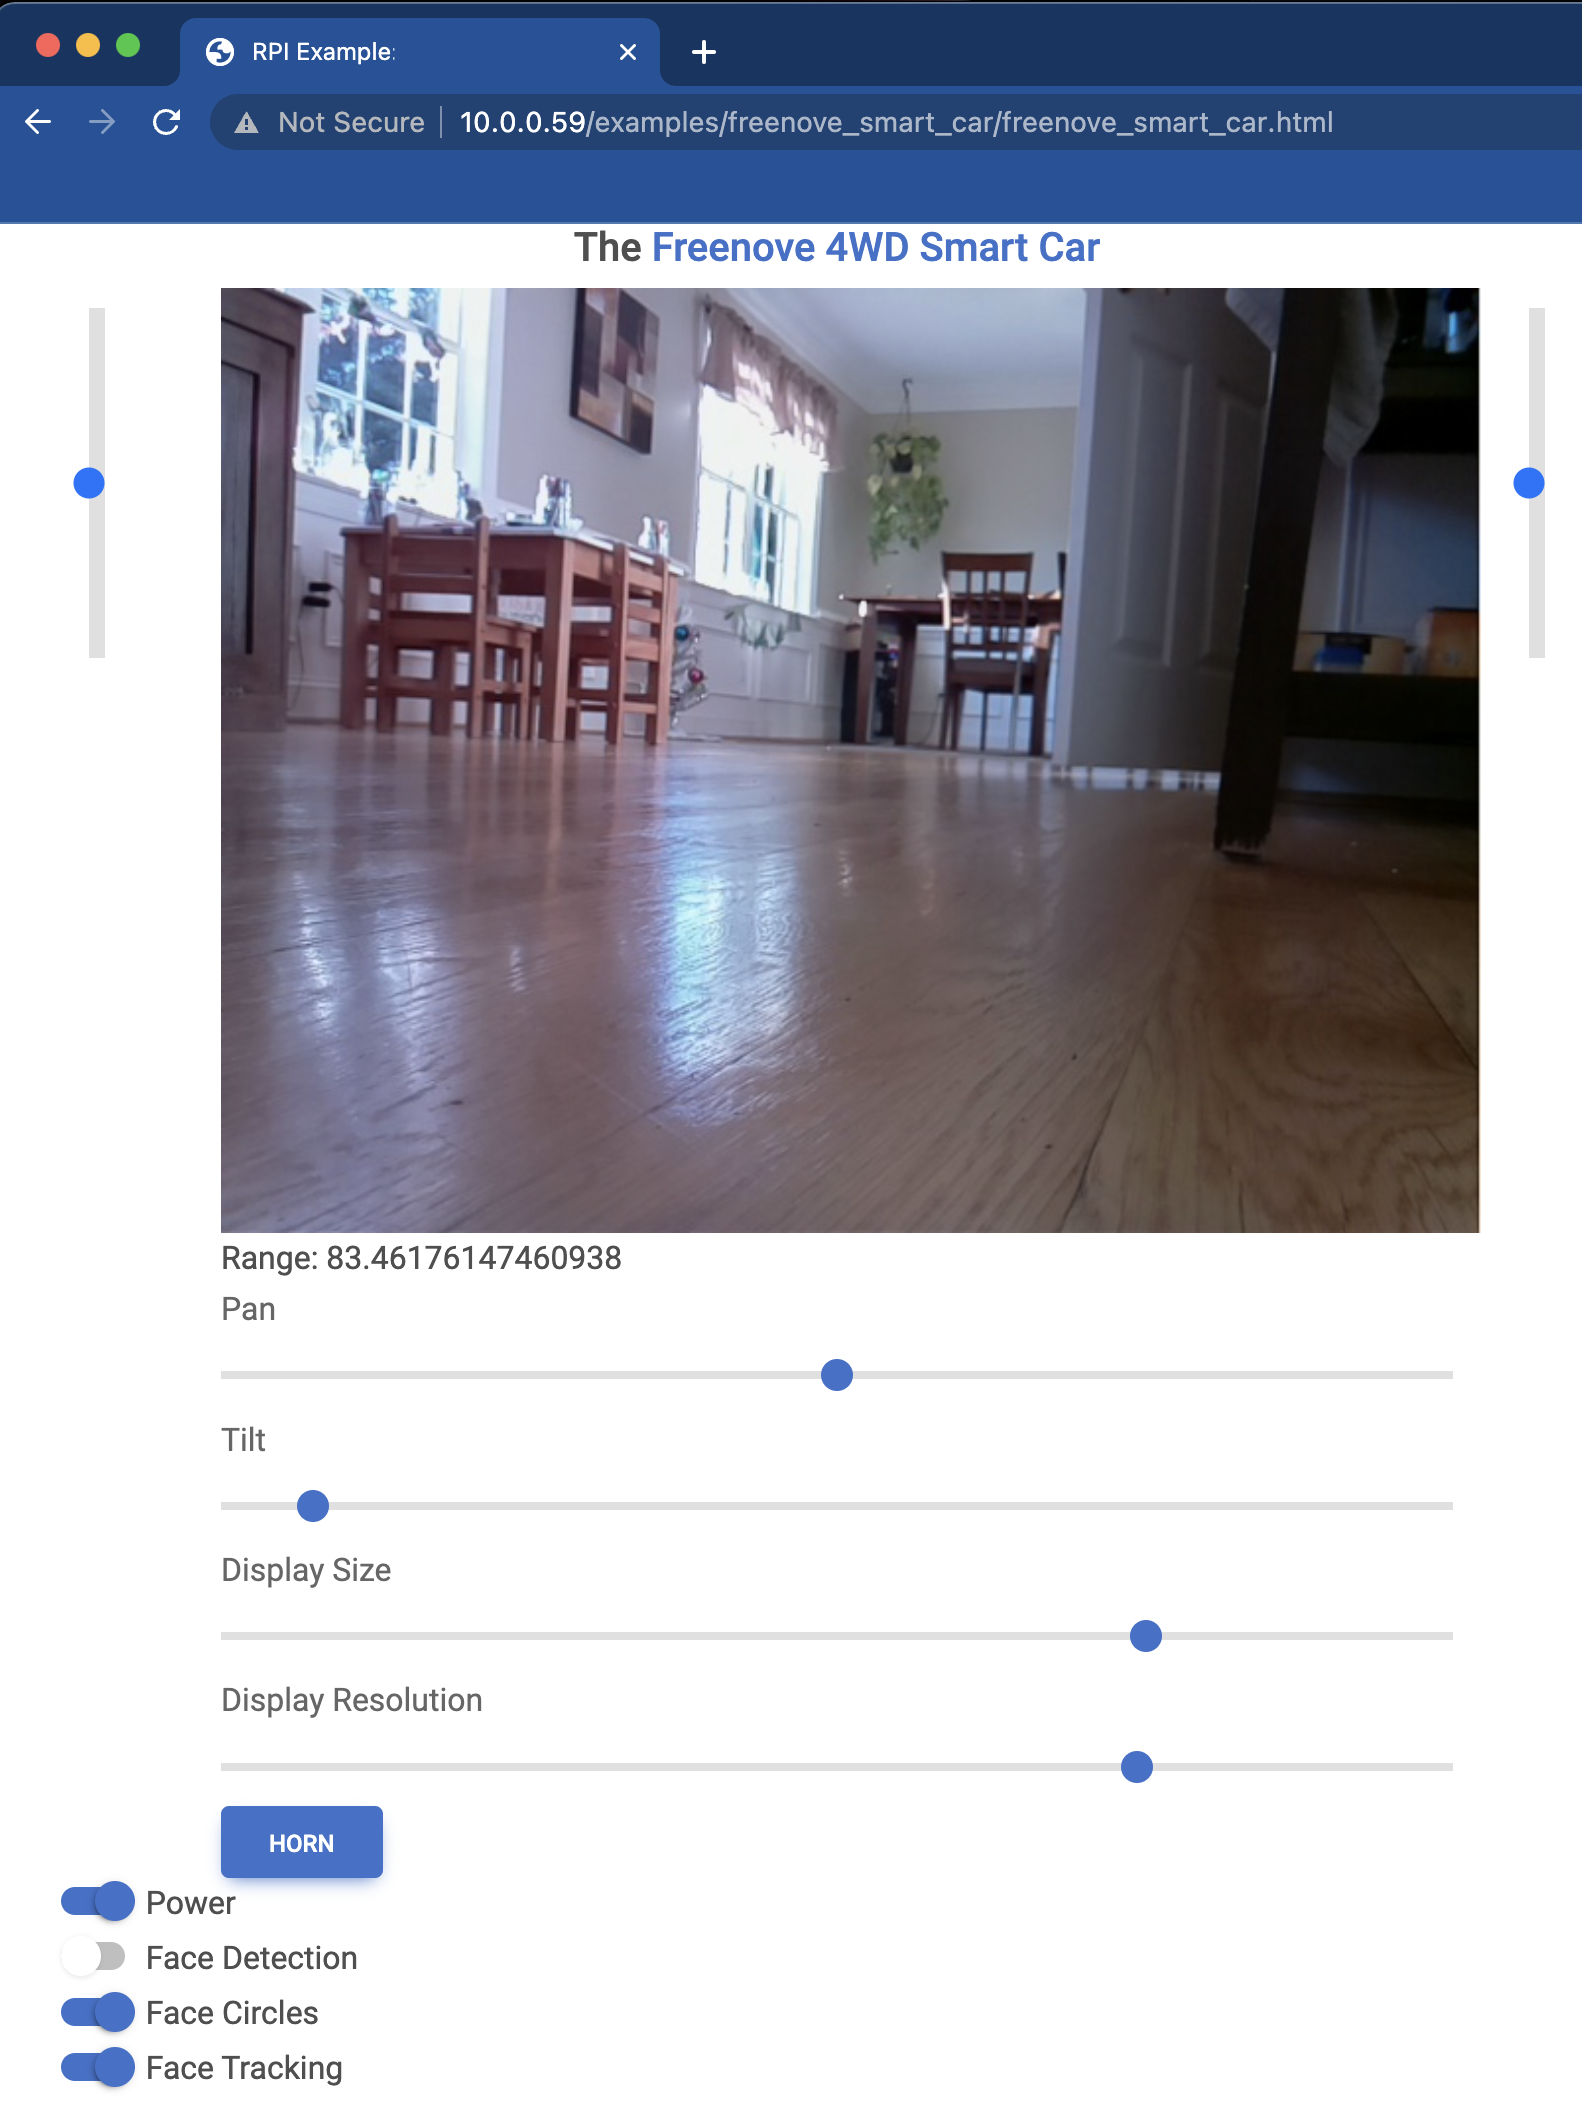
The Freenove 4WD Smart Car comes with Python software, including a remote control interface. I have reimplemented most of the capabilities using the present Python package. The screenshot above shows the control screen for the car based on the RpyFlask framework provided by this package. The page describes the RpyFlask application, the web components that provide remote controls, and the REST server that handles remote control requests. Later sections of this page explore enhancements to the standard car hardware including a 3D-printed robotic arm and LTE connectivity.
RpyFlask Application
The RpyFlask application for the car is similar those for other examples (see the LED, servo, and DC motor). The car has a few more options, but the concept is the same: Configure the component (car), invoke the RpyFlask framework to generate necessary HTML/JavaScript controls, embed the controls in a web page to provide remote control, and start the RpyFlask REST server to handle remote control requests.
Web Components
RpyFlask REST Server
Enabling the WS281x LED Strip
The WS281x series of LED strips is a popular solution for controllable LEDs, with the benefit that only a single
pulse-wave modulation (PWM) input signal is needed for control. The Python class for this component is
here.
The class itself is straightforward. The difficulty lies in the need to give the Python-side PWM control software
(rpi-ws281x) write access to /dev/mem. The package writes /dev/mem directly
as a means of controlling the PWM signal generated on GPIO-18, which controls the car’s LED strip. All of this is fine,
except that the /dev/mem device is an image of the system’s main memory. As such, the device is highly sensitive and
locked down by default.
Unlocking /dev/mem for Non-Root Access Immediately Upon Boot
WARNING: This is a security risk. Do not use this approach unless you understand the security implications. Even if you do understand and accept the security implications, this isn’t a great idea.
Having issued the above warning, I’ll say that this approach checks several boxes. It unlocks /dev/mem on boot for
user-space programs like the REST server for the smart car. I wanted this so that I could simply hit the power
button on the car and be driving immediately using the remote web interface.
Begin by adding the ubuntu user to the kmem group, which is the default group owner of /dev/mem:
sudo usermod -a -G kmem ubuntu
Next, give the kmem group read/write access to /dev/mem upon boot:
sudo emacs /etc/udev/rules.d/99-devmem.rules
Add SUBSYSTEM=="mem", KERNEL=="mem|kmem", GROUP="kmem", MODE="0660" to the file.
The REST server for the car runs on the flask framework for Python. Since
access to /dev/mem requires both read/write file permissions (set above) and binary capability, we need to add a
binary capability to the Python binary. First, figure out where the binary is:
which python  # /home/ubuntu/Repos/raspberry-py/venv/bin/python
ls -l  # /home/ubuntu/Repos/raspberry-py/venv/bin/python  # /home/ubuntu/Repos/raspberry-py/venv/bin/python -> /usr/bin/python3.9
Then add the CAP_SYS_RAWIO capability to the Python binary:
sudo setcap cap_sys_rawio+ep /usr/bin/python3.9
Finally, restart to get the group and read/write access to take:
sudo shutdown -r now
At this point, any user-space program running the Python 3.9 binary will have read/write access to the system’s main memory. This should make you at least a little uncomfortable, but the LED strip on the car should be working. Start the flask server and the remote web-control interface should be available:
~/Repos/raspberry-py/src/raspberry_py/rest/examples/
flask --app freenove_smart_car.freenove_smart_car run --host 0.0.0.0
A Safer (and Simpler) Alternative: sudo
I went down the rabbit hole described above without giving much thought to the obviously better alternative: sudo.
The sudo approach avoids the security nastiness of adding a standard user to the system-level kmem group, opening up
/dev/mem for writing by kmem, and endowing all python3.9 commands with elevated binary capabilities. This
script is
sufficient to get this working via sudo ./startup.sh. As noted in the script, the same can be done on boot with
sudo crontab -e (edit the root user’s crontab) and adding the following line:
@reboot /home/ubuntu/Repos/raspberry-py/src/raspberry_py/rest/examples/freenove_smart_car/startup.sh
This is much safer, as only a single process has elevated permissions for reading/writing /dev/mem. It is also much
simpler than the previous approach.
References
- rpi-ws281x Python package for LED strip control
- Why rpi-ws281x requires sudo
- Add CAP_SYS_RAWIO capability
- Remove CAP_SYS_RAWIO capability
- Set /dev/mem permissions on boot
Enhancement: Robotic Arm
Why not add a robotic arm to the Freenove car? See here for the design of the arm, which is not specific to the car but will be mounted and controlled by it. The arm is shown below:
The car is able to control eight SG90 servo motors via hardware pulse-wave modulation (PWM). Only two PWM channels are used in the standard car build (for the camera pan and tilt servos) leaving six channels open for other uses. The robotic arm has five degrees of freedom, each controlled with an SG90 servo. But where to mount the arm for effective remote control? Ideally, the arm would be within the camera’s field of view to assist with control; however, the camera that comes with the Freenove car is front-mounted. The following shows a custom bracket that includes rear-mount holes for the camera servos and a front-end platform for the robotic arm:
The bracket clips to the car chassis without the need for holes or screws. The print takes about 9 hours using 60g of filament (~$1.20).
The car with assembled arm is shown below:

Enhancement: LTE Smart Car
Cellular Antenna
- https://www.thinkpenguin.com/gnu-linux/usb-4g-lte-advanced-modem-gnulinux-tpe-usb4glte
- https://www.amazon.com/dp/B07XXBQPZL/
Cellular Connections
See here.
SSH Reverse-Tunneling
The above setup works well when the car (Raspberry Pi) has an easily accessible IP address. This is usually the case when the car is connected to a local Wi-Fi network. However, if the car is connected to an LTE network, then its IP address might be inaccessible. The car’s IP address might also be inaccessible if the car is behind a NAT system. If the controlling device (e.g., laptop) has an accessible IP address, then we can use SSH reverse tunneling to establish the connection.
- Configure Apache to listen on port 8080:
sudo emacs /etc/apache2/ports.confAs noted at the top, editing the listening port also requires editing the listening port of the site’s VirtualHost statement:
sudo emacs /etc/apache2/sites-available/rpy-rest.confThen restart Apache:
sudo systemctl restart apache2 - Start the SSH reverse tunnels, one for REST traffic to the Flask server over port 5000, and the other for JavaScript
traffic to the Apache web server over port 8080:
ssh -R localhost:5000:localhost:5000 -R localhost:8080:localhost:8080 -l USER HOSTIn the above,
USERandHOSTare the user account and host of the controlling device. Once this SSH connection is established, any connections established at the controlling device at thelocalhost:5000orlocalhost:8080ports will be forwarded to the car’s localhost interface at the same ports. - Next, write component files that connect to the SSH reverse tunnel via localhost:
write_component_files --app freenove_smart_car.freenove_smart_car --rest-host localhost --rest-port 5000 --dir-path freenove_smart_car/componentsIf all has gone well above, then you should be able to open a web browser on the controlling device and pull up
http://localhost:8080. Then browse to the car’s control screen. All communication between the controlling device and the car will be secured via the SSH reverse tunnel.