Home
- Python Interface for GPIO Circuits
- Remote Control of GPIO Circuits via REST/HTML/JavaScript
- CAD Parts and 3D Printing
- Use and Development
- Incrementing and Tagging Versions with Poetry
- Troubleshooting
Python Interface for GPIO Circuits
This package provides two related capabilities. First, it provides a high-level, event-driven Python interface for GPIO circuits running on the Raspberry Pi. Sensors, motors, LEDs, switches, and many other components are covered.
Remote Control of GPIO Circuits via REST/HTML/JavaScript
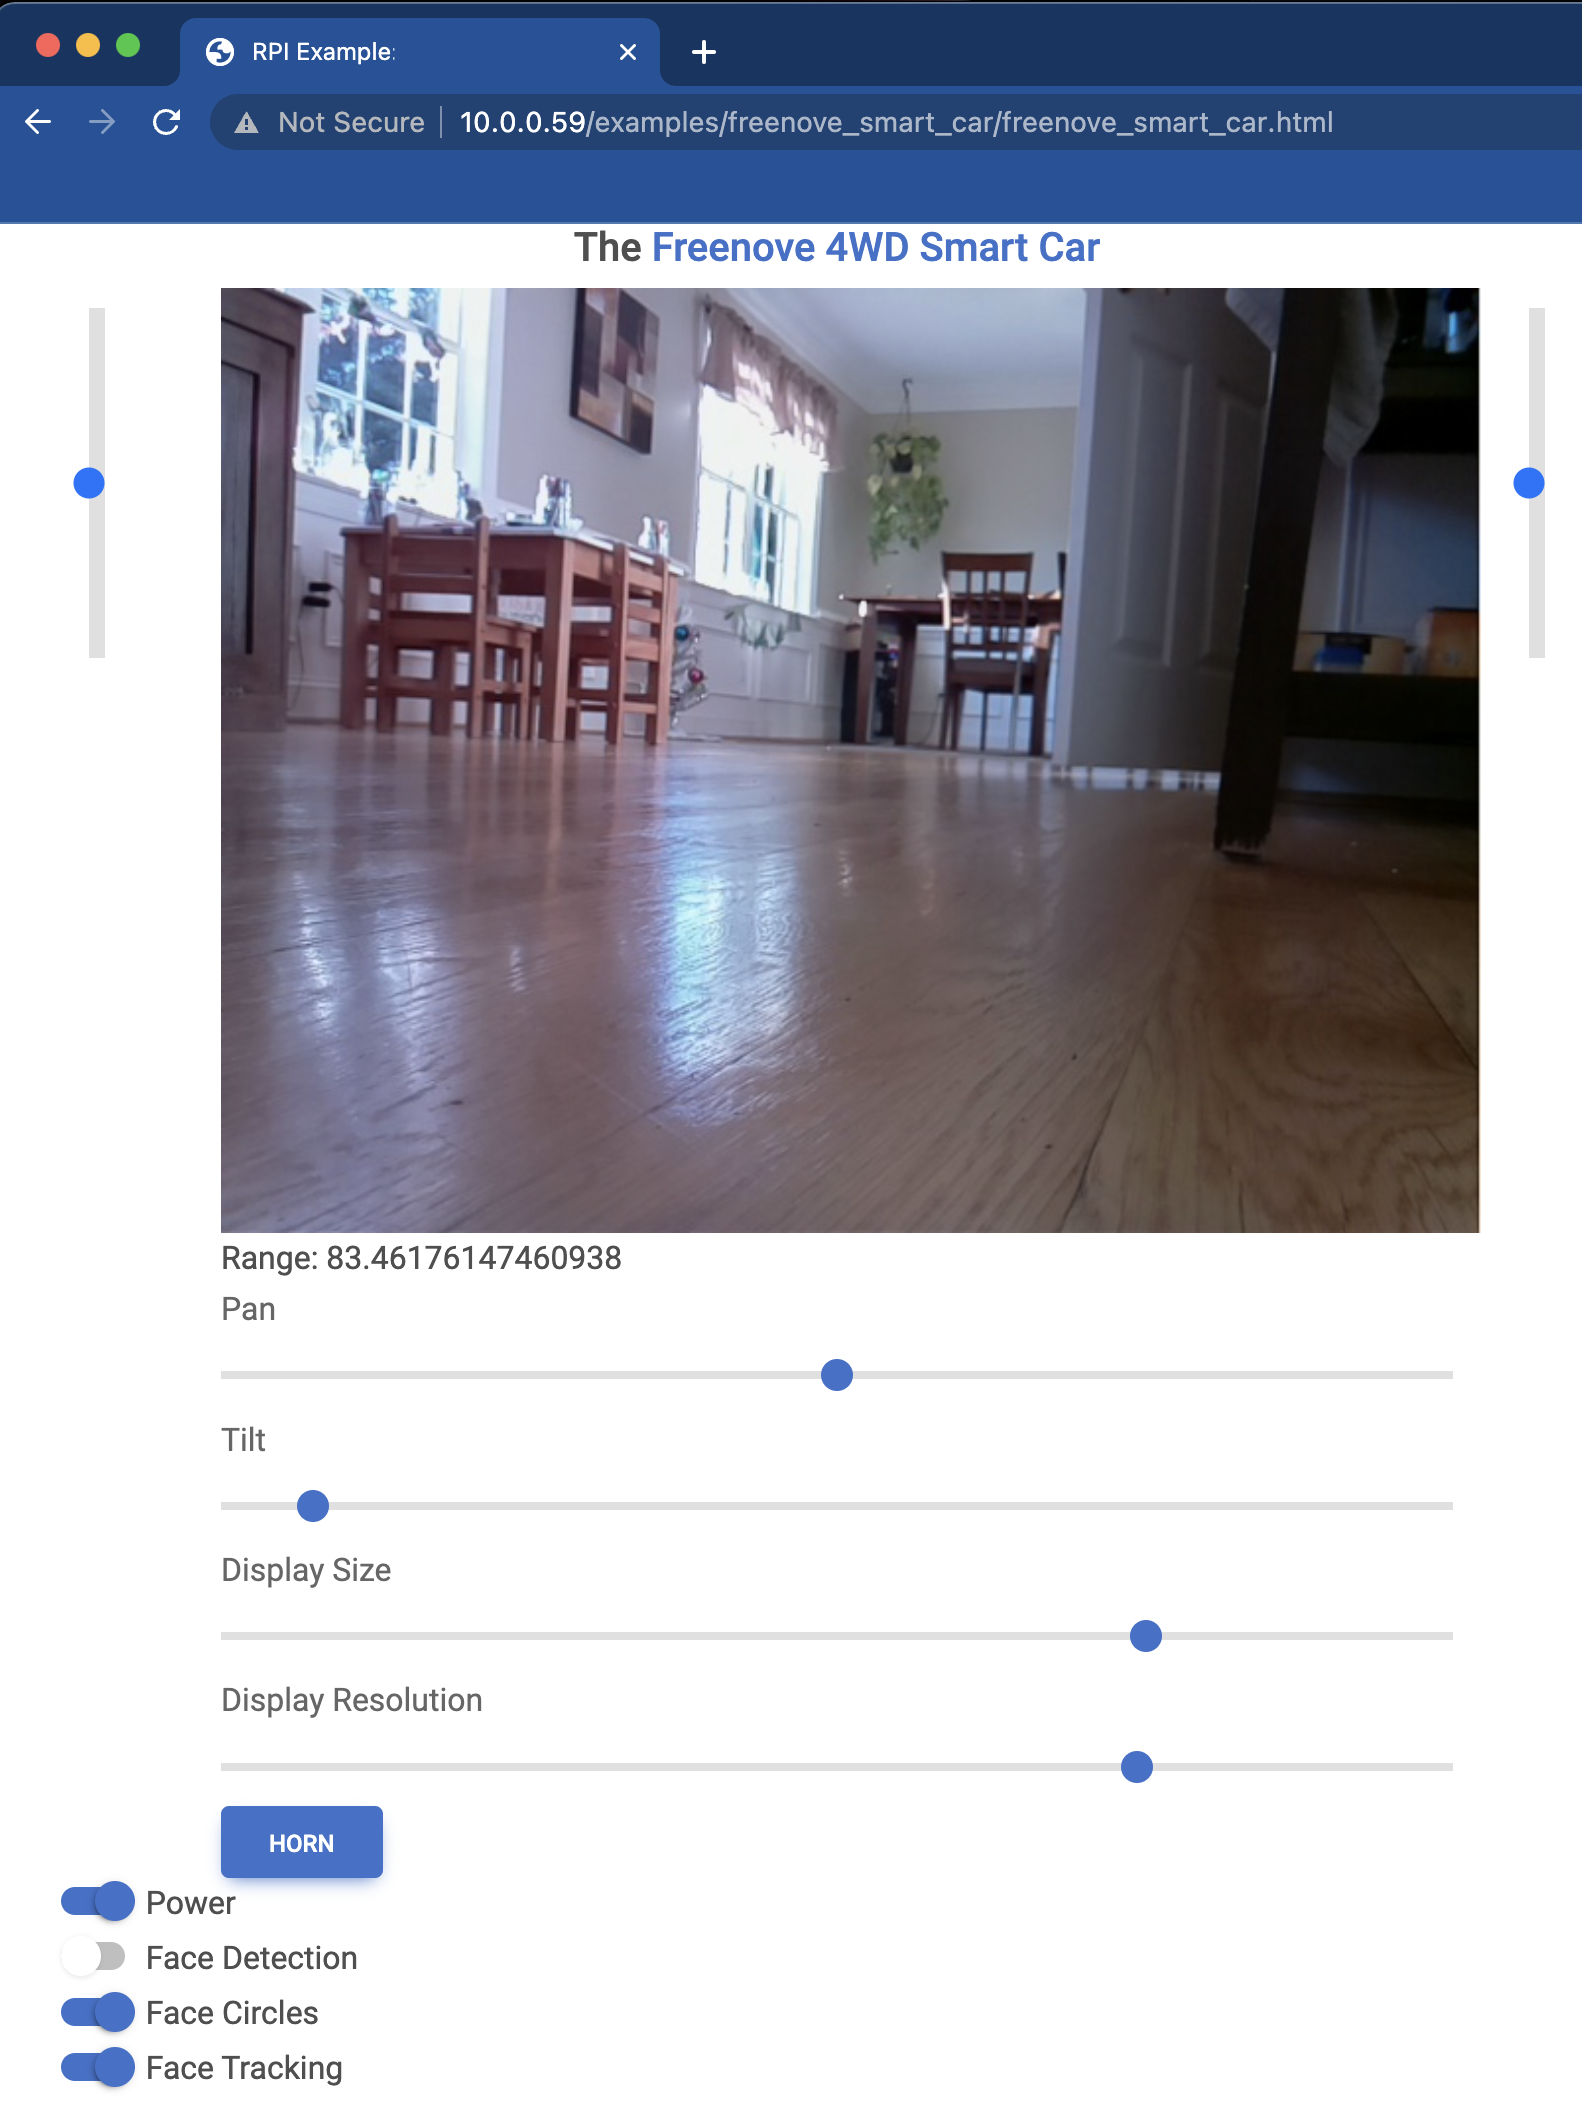
Second, this package enables remote control of GPIO circuits via REST APIs invoked from HTML/JavaScript front-ends. Want to control your circuit remotely from your phone? Look no further. This package auto-generates HTML/JavaScript for GPIO circuits based on Material Design for Bootstrap. These HTML/JavaScript elements can be embedded in full web pages for remote control of the circuit. The remote control screen for the Freenove Smart Car is shown below:
As another example, consider the 3D-printed robotic arm that I designed for the car:
CAD Parts and 3D Printing
I have designed a range of parts for integration with the Raspberry Pi. See here.
Use and Development
Raspberry Pi now provides a 64-bit Debian-based operating system (OS) via the Raspberry Pi Imager. The OS is quite good, though for some uses Ubuntu seems to work equally well if not better. I’ve written steps for both operating systems here and here, respectively. The following steps use poetry for installation.
The raspberry-py package can be consumed in two ways:
- Add
raspberry-pyto a project as a PyPI dependency. This is the best approach if you only want to use the functionality provided byraspberry-py. Theraspberry-pypackage is available here, and an example of adding the package dependency is provided here. - Fork the present repository and then install it locally. This
is the best approach if you want to enhance and/or fix the functionality provided by
raspberry-py. In the following,XXXXis the user account into which the repository is forked:git clone git@github.com:XXXX/raspberry-py.git cd raspberry-py poetry env use 3.11 poetry installFrom here, you can push back to your fork and submit a pull request to the original if desired.
Incrementing and Tagging Versions with Poetry
- Begin the next prerelease number within the current prerelease phase (e.g.,
0.1.0a0→0.1.0a1):OLD_VERSION=$(poetry version --short) poetry version prerelease VERSION=$(poetry version --short) git commit -a -m "Next prerelease number: ${OLD_VERSION} → ${VERSION}" git push - Begin the next prerelease phase (e.g.,
0.1.0a1→0.1.0b0):OLD_VERSION=$(poetry version --short) poetry version prerelease --next-phase VERSION=$(poetry version --short) git commit -a -m "Next prerelease phase: ${OLD_VERSION} → ${VERSION}" git pushThe phases progress as alpha (
a), beta (b), and release candidate (rc), each time resetting to a prerelease number of 0. Afterrc, the prerelease suffix (e.g.,rc3) is stripped, leaving themajor.minor.patchversion. - Release the next minor version (e.g.,
0.1.0b1→0.1.0):OLD_VERSION=$(poetry version --short) poetry version minor VERSION=$(poetry version --short) git commit -a -m "New minor release: ${OLD_VERSION} → ${VERSION}" git push - Release the next major version (e.g.,
0.1.0a0→2.0.0):OLD_VERSION=$(poetry version --short) poetry version major VERSION=$(poetry version --short) git commit -a -m "New major release: ${OLD_VERSION} → ${VERSION}" git push - Tag the current version:
VERSION=$(poetry version --short) git tag -a -m "rlai v${VERSION}" "v${VERSION}" git push --follow-tags - Begin the next minor prerelease (e.g.,
0.1.0→0.2.0a0):OLD_VERSION=$(poetry version --short) poetry version preminor VERSION=$(poetry version --short) git commit -a -m "Next minor prerelease: ${OLD_VERSION} → ${VERSION}" git push
Troubleshooting
- If
poetry installhangs when attempting to unlock the keyring, disable the keyring with the following:poetry config keyring.enabled false